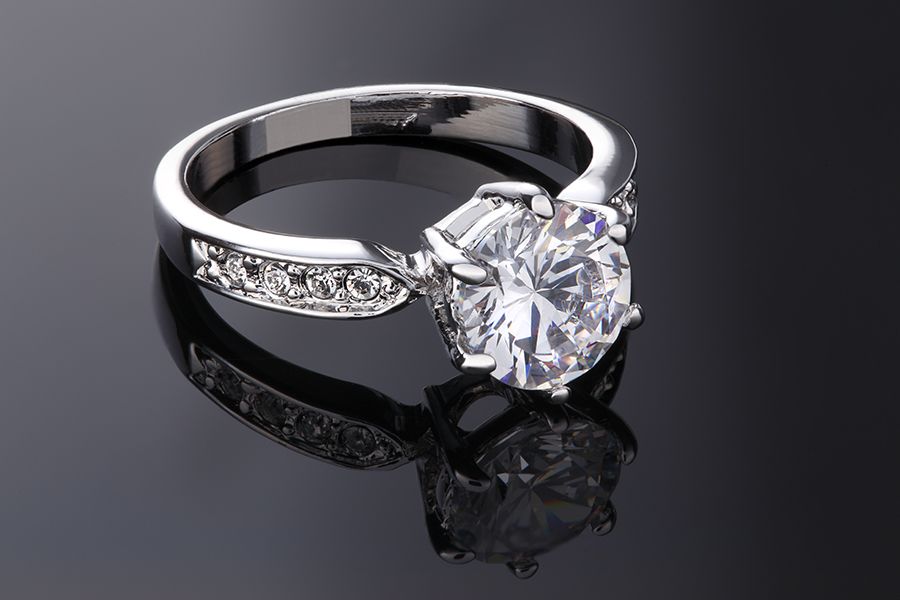
When it comes to selling jewellery online, the importance of high-quality product photos cannot be overstated.
Great photos not only showcase the beauty and intricacy of your pieces but also build trust with potential buyers.
DIY jewellery photography can save costs and provide the flexibility to capture your products exactly how you envision them.
Understanding Your Equipment
Cameras and Smartphones
While a high-quality DSLR or mirrorless camera can offer superior image quality, modern smartphones are equipped with impressive cameras that can produce excellent results for jewelry photography.
Whether you use a dedicated camera or a smartphone, the key is understanding how to make the most of your device.
Lenses
For those using interchangeable lens cameras, a macro lens is invaluable for capturing the fine details of jewelry. Macro lenses allow you to get close to your subject, revealing intricate patterns and textures that might be missed with a standard lens.
Tripods and Stabilizers
A stable camera is crucial for sharp images, especially in close-up photography. Using a tripod or stabilizer ensures that your camera remains steady, reducing the risk of blurriness caused by hand movements.
Setting Up Your Space
Lighting
Lighting is perhaps the most critical aspect of jewelry photography. Natural light is often the best option, as it provides a soft, even illumination. If natural light is not available, artificial lighting with softboxes or diffusers can mimic daylight and reduce harsh shadows.
Backgrounds
Choosing the right background is essential to make your jewelry stand out. Neutral backgrounds like white, black, or grey are popular choices, as they don’t distract from the piece. You can also experiment with textured or colored backgrounds to complement your jewelry.
Props and Styling
Props can enhance the visual appeal of your photos by adding context or highlighting certain features of the jewelry. However, be careful not to overuse props, as they can distract from the main subject.
Preparing Your Jewelry
Cleaning and Polishing
Before you start shooting, ensure your jewelry is spotless. Even the smallest speck of dust or fingerprint can be magnified in close-up photos. Use a soft cloth to clean and polish each piece thoroughly.
Positioning and Arranging
The way you position your jewelry can significantly impact the final image. Experiment with different angles and arrangements to find the most flattering presentation. Use jewelry stands or wax to help keep items in place.
Lighting Techniques
Soft Lighting
Soft lighting minimizes harsh shadows and highlights, giving your jewelry a polished look. You can achieve soft lighting by using diffusers, light tents, or lightboxes, which spread the light evenly over your subject.
Reflections and Shadows
Jewelry, especially pieces with shiny metals or gemstones, can be tricky to photograph due to reflections. Position your lights and reflectors carefully to control reflections and minimize unwanted shadows.
Using Reflectors
Reflectors are useful tools for bouncing light onto your jewelry, reducing shadows, and adding a subtle glow. White cards or professional reflectors can be positioned around your setup to enhance the lighting.
Camera Settings
ISO, Aperture, and Shutter Speed
Optimal camera settings are essential for clear, detailed photos. Use a low ISO setting (100-200) to minimize noise. A small aperture (high f-stop number) increases the depth of field, ensuring more of your jewelry is in sharp focus. Adjust the shutter speed to balance the exposure, using a tripod to prevent blur.
Focus and Depth of Field
Achieving sharp focus is crucial in jewelry photography. Use manual focus or a focus stacking technique to ensure every detail is crisp. A deep depth of field is often desirable, but for artistic shots, you might experiment with a shallow depth to highlight specific parts.
Composition Tips
Rule of Thirds
Applying the rule of thirds can create balanced and visually appealing photos. Imagine a grid overlay on your image and position your jewelry along these lines or at their intersections.
Angles and Perspectives
Don’t be afraid to experiment with different angles and perspectives. Shooting from above, at eye level, or even from a low angle can provide unique views that highlight different aspects of your jewelry.
Close-ups and Details
Close-up shots are essential for showcasing the intricate details of your jewelry. Use a macro lens or the close-up mode on your camera to capture fine patterns, engravings, and textures.
Post-Processing and Editing
Basic Edits
After your photoshoot, basic edits can significantly enhance your images. Adjust brightness, contrast, and color balance to ensure the jewelry looks as appealing as possible.
Advanced Techniques
For a professional touch, use advanced editing techniques to retouch imperfections, adjust highlights and shadows, and sharpen details. Software like Adobe Photoshop or Lightroom offers powerful tools for these adjustments.
Software Recommendations
There are various software options available for editing jewelry photos. Adobe Lightroom and Photoshop are industry standards, but more affordable options like GIMP or online editors like Pixlr can also deliver excellent results.
Consistency and Branding
Developing a Style
Creating a consistent style for your jewelry photos helps in establishing your brand identity. Use similar lighting, backgrounds, and editing styles for all your photos to create a cohesive look.
Brand Colors and Themes
Incorporate your brand colors and themes subtly into your photos. This could be through the use of props, backgrounds, or editing styles that reflect your brand’s identity.
DIY vs. Professional Photography
When to DIY
DIY photography is a great option when you have the time and resources to invest in learning and practicing. It’s cost-effective and gives you full creative control over how your jewelry is presented.
When to Hire a Professional
There are times when hiring a professional photographer is worth the investment. If you need high-volume photos, specialized shots, or don’t have the time to learn photography, a professional can deliver high-quality results efficiently.


